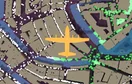
In Zombies Aren't Real, use Hold to gather scattered civilians, then draw an Evac Corridor from the inner circle toward a reachable Safe Zone gate. Place Hold by dragging outward from the spot where you want people to gather, then draw the Corridor from the crowd toward the entrance. Check that the Corridor's arrow follows a clear street, since civilians can get stuck if the lane sends them straight into a building. Once the outbreak starts, watch whether the group leaves Hold, follows the route, and actually passes through the gate.

Place Hold where you want civilians to gather
Press E to select Hold, click where you want civilians to gather, and drag outward to set the area. The outer circle draws nearby civilians toward the center, and the inner circle keeps them together once they arrive. Check that the outer circle reaches the group you want and that the inner circle gives them a clear way onto the next street. Civilians move slowly toward the center, so allow for that delay when deciding where to put the gathering point.
Inside a Safe Zone, place Hold away from the perimeter to pull civilians back from the walls. Outside the zone, use it when scattered groups need to gather before taking the same route to a gate. Hold creates no walls, so people can still be overrun while they gather or wait. If the group is already on a street that leads toward the gate, try a Corridor alone and skip the extra gathering step.
Draw Evac Corridors along clear streets
Select Evac Corridor from the planning tools and drag from the start of the route toward the destination. The shaded lane shows the area it covers, and the arrow shows which way civilians move once they enter it. Start the lane over the group you want to move or across a street they're likely to use. If the lane misses some of the crowd, use the placement prompt to adjust its width while keeping the route clear of buildings.
Civilians move quickly in the direction of the arrow, but they can run straight into a building instead of turning around it. For a route with a corner, end the first Corridor at the turn and start a second one there, pointing down the next street. Check that civilians leaving the first lane can enter the second without running into the corner building. A diagonal across several blocks may look shorter, but two clear street segments give the group a better chance of reaching the gate.
Build a Safe Zone with a reachable gate
During planning, select the Safe Zone tool and click to place corners around the blocks you want to protect. Click the first corner again or press Enter to close the perimeter. Wall cost rises with perimeter length, so start around a useful concentration of civilians and leave money for gates and defenses. If a wall stretches across empty ground or beyond garrison coverage, drag the zone's corners inward and check the updated cost.
Press G and place a Gate on the boundary where a clear street meets the zone. To pick a spot, start at the civilian group and trace its approach to the wall. A gate on the far side may be close on the map but still require a long detour, leaving people crowded against the wall they reached first. Add another opening only if it serves a distinct approach you can defend.
Link Hold to a gate or Broadcast
Suppose civilians are spread across side streets and the Safe Zone gate faces the main road. Place Hold near the main road so its outer circle reaches the groups you want to gather and its inner circle sits near the route to the entrance. Start the Corridor over the part of the inner circle where civilians will wait, then drag along the road toward the gate. The Corridor can pull people out of Hold, so watch for the crowd to leave the inner circle and enter the lane once the outbreak starts.
If you have a suitable Civic building inside the Safe Zone, assign it to Broadcast and check the radius shown for that building. Broadcast calls civilians in range toward the zone at the start of the battle, but people outside the walls still need a usable gate. For a group just beyond the radius, try ending a Corridor just inside the circle so Broadcast can draw them the rest of the way. When Broadcast already reaches the group and the gate is easy to approach, you can save the money you'd otherwise spend on Hold and Corridor.
Fix the route where civilians stop moving
If civilians stay in the Hold circle, check that the first lane covers the part of the inner circle where they're actually standing. Make sure its arrow points out of the circle and toward the next stretch of road. If people leave Hold but stop at a building, redraw that segment along the street. If they stop at a turn, check whether the first lane sends them into the start of the next one.
If civilians reach the wall but stay outside, check whether the final arrow leads to the gate opening or to the wall beside it. Try ending the lane closer to the entrance and watch whether more people pass through on the next attempt. There's no need to assume the lane must touch the gate at an exact point, since the key test is whether people can reach the opening from where the lane ends. If the approach runs into a solid wall, move the gate to a reachable spot or redirect the lane to an existing entrance.
Even with a clear lane and a reachable gate, civilians may scatter or flee in an unexpected direction when zombies get close. Civilian movement can change during Early Access, so start with a single visible group, a short lane, and one nearby entrance if the behavior is hard to read. On the next attempt, change one part of the layout and watch the same stretch of road to see whether that adjustment helps.
Shorten the trip when zombies cut off the route
An Evac Corridor directs civilians, but it gives them no protection on the way to the gate. If zombies consistently reach a bridge or main road ahead of the group, try a shorter approach or put the Safe Zone closer. Separate groups may be easier to reach with smaller zones, provided you have enough money to defend each perimeter and its entrances. If civilians get through the gate and the zone falls later, use the debrief to look for a breach before spending more money on evacuation routes.